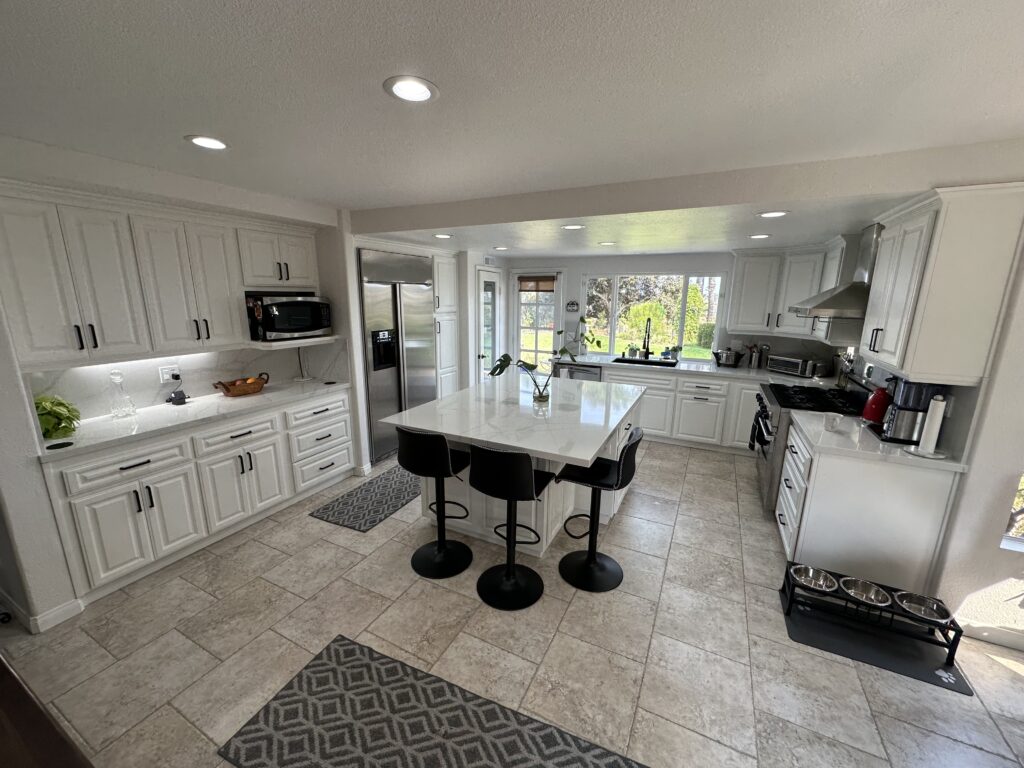
Picture this: you’ve just walked into your kitchen, and it feels outdated, even though the appliances are modern and the layout works perfectly. For many homeowners, the cabinets dominate the visual appeal of their kitchen. Replacing them might seem the only solution, but a smarter, budget-friendly option is painting interior kitchen cabinets.
One family recently realized that repainting their kitchen cabinets could save them thousands of dollars while achieving a sleek, modern look. They were amazed at how a fresh coat of paint transformed their space into the kitchen of their dreams.
Painting interior kitchen cabinets can provide the perfect solution, whether after a farmhouse feel, minimalist design, or bold color statement.
Key Takeaways:
- Painting interior kitchen cabinets is an affordable way to refresh your space.
- Success lies in preparation, quality materials, and attention to detail.
- DIYers and professionals alike can achieve stunning results with proper techniques.
1. Assess Your Cabinets for Paint Readiness
Not all cabinets are equal when it comes to painting. First, determine whether your cabinets are suitable for a paint upgrade.
Questions to Ask Yourself:
- Are the cabinets structurally sound?
- Is the current surface (wood, laminate, or MDF) paintable?
- Do you want to preserve visible wood grain or cover it completely?
If your cabinets have major structural issues or peeling veneers, repairs might be necessary before you can proceed.
2. Choose the Right Paint for the Job
Selecting the correct paint can make all the difference when painting interior kitchen cabinets. Kitchen cabinets endure daily wear and tear, so durability is key.
Best Types of Paint for Cabinets:
- Acrylic Latex Paint: Easy to clean, low odor, and durable.
- Oil-Based Paint: Offers a smooth finish but requires more drying time.
- Cabinet-Specific Paint: Designed for adhesion, durability, and resistance to grease and stains.
3. Don’t Skimp on Preparation
Proper preparation is the secret to a flawless finish. Skipping steps may lead to peeling paint, uneven coverage, or a lackluster result.
Preparation Steps:
- Empty and Remove: Clear the cabinets of contents and remove doors, drawers, and hardware.
- Clean Thoroughly: Use a degreaser to remove grime and kitchen oils.
- Sand the Surface: Lightly sand to create a smooth, paint-ready finish.
- Repair Imperfections: Fill cracks, chips, or dents with wood filler and smooth sand.
4. Prime for Perfection
Priming is a non-negotiable step when painting interior kitchen cabinets. It ensures the paint adheres well and provides a uniform base.
Primer Tips:
- Use a primer formulated for kitchen surfaces and cabinet material.
- Apply thin, even coats with a roller or brush.
- Allow the primer to dry completely before applying the paint.
5. Master the Painting Process
The actual painting stage is where your cabinets come to life. The goal is to achieve a streak-free, professional-looking finish.
Tips for Painting:
- Use a high-quality brush for edges and a foam roller for flat surfaces.
- Apply the paint in thin layers to prevent drips.
- Sand lightly between coats for a smoother finish.
- Apply at least two coats of paint, allowing each to dry thoroughly.
Pro Tip:
Consider trendy colors like navy blue, sage green, or crisp white for a modern look.
6. Seal for Long-Term Durability
A topcoat protects your freshly painted cabinets from scratches, stains, and moisture.
Best Options for Sealing:
- Polyurethane: Offers a durable finish, available in matte, satin, or gloss.
- Water-Based Polycrylic: Dries faster and resists yellowing.
Apply two to three coats of sealer, allowing ample drying time between layers.
7. Reassemble with Care
Once your cabinets are painted and sealed, it’s time to reassemble them. Taking time during reassembly will ensure the final product looks polished and professional.
Reassembly Steps:
- Reattach doors and drawers using clean or updated hardware.
- Align hinges properly to prevent uneven gaps.
- Add felt pads to doors to avoid chipping over time.
Key Takeaways Revisited:
- When painting interior kitchen cabinets, preparation is critical for a smooth and durable finish.
- Using the right primer, paint, and topcoat ensures lasting results.
- Small details, like aligning hardware, can make a big difference in the finished look.
Benefits of Painting Interior Kitchen Cabinets
Are you not convinced that painting interior kitchen cabinets is the right choice? Consider these advantages:
- Cost-Effective: A fraction of the cost of replacing cabinets.
- Customizable: Tailor colors and finishes to your style.
- Eco-Friendly: Reuse existing materials instead of sending old cabinets to the landfill.
- Quick Upgrade: Transform your kitchen in a matter of days.
Why Choose Lifetime Custom Painting?
While painting interior kitchen cabinets can be a satisfying DIY project, it’s not without its challenges. For a truly professional finish, trust the experts at Lifetime Custom Painting.
With years of experience and a reputation for excellence, we specialize in cabinet painting that lasts. Whether you want to modernize your kitchen or restore its classic charm, we have the skills and tools to make your vision a reality.
Call us today at [phone] for a free estimate, and let’s bring new life to your kitchen cabinets!


